
Docs / The saber path
Wiring
Tell Hiltwright which board, buttons, prop file and blades your saber has, and confirm the pins before anything is installed.
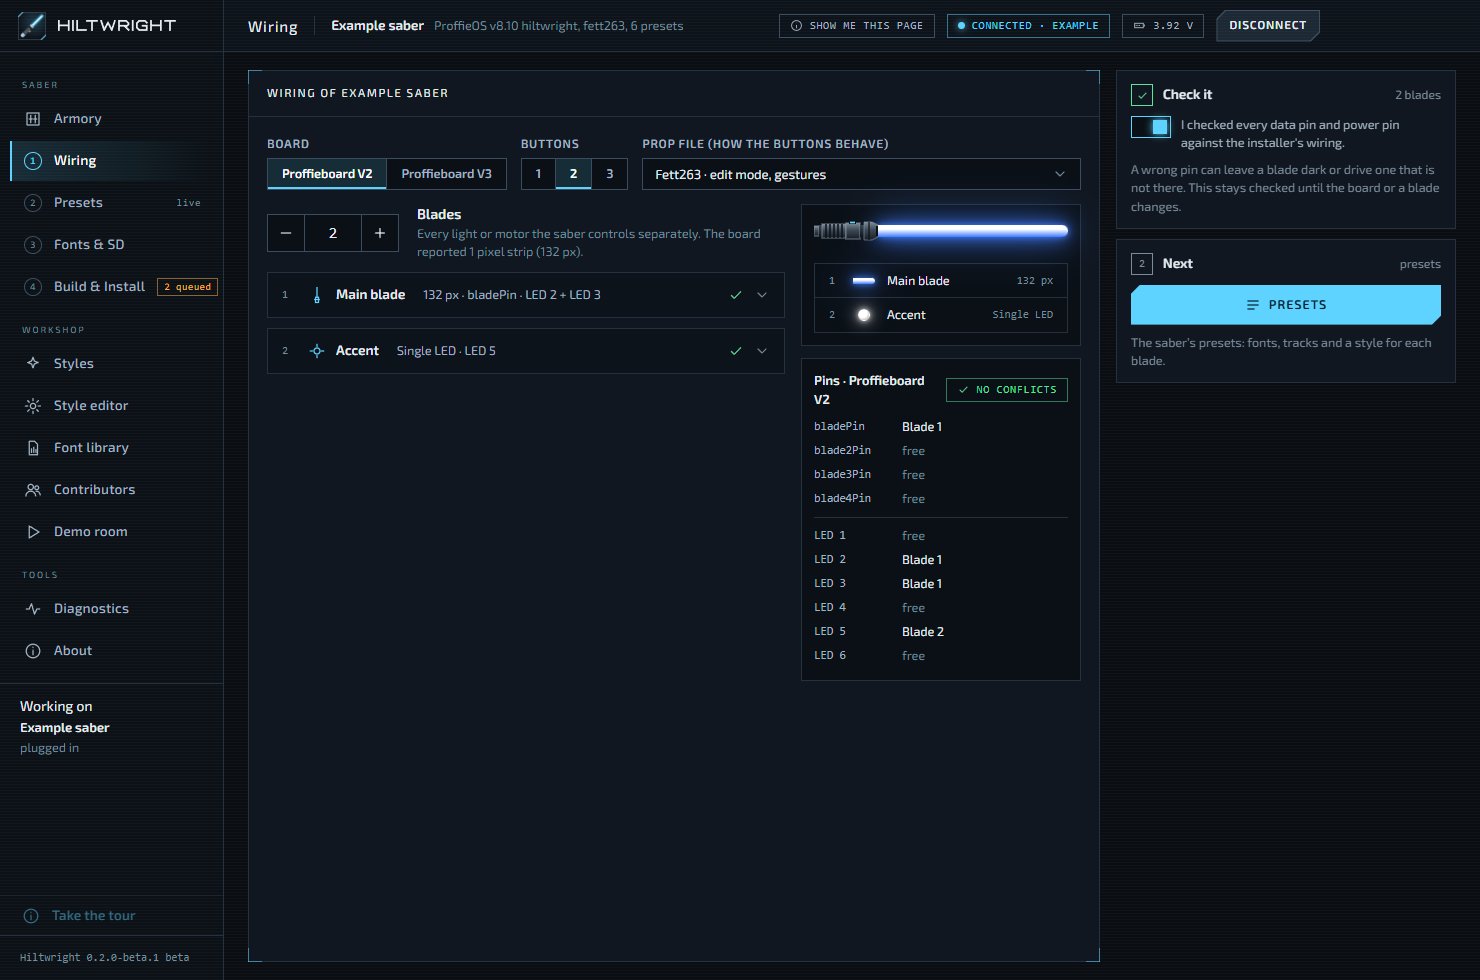
Step 1 is Wiring. Here you describe the hardware once: the board, the buttons, the prop file and every blade, with the pins each one uses. Old firmware cannot tell Hiltwright this, so you say it and then check it against what your installer wrote down.
Changes save by themselves a moment after you make them.
#Board, buttons and prop
Start here with every saber.
- Board. Choose "Proffieboard V2" or "Proffieboard V3". The label on the board says V2.2 or V3.x. Until you choose, a warning says "Which Proffieboard is this?" and nothing is built.
- Buttons. Choose 1, 2 or 3.
- Prop file (how the buttons behave). The prop file is the part of ProffieOS that decides what each button press does, such as ignite, change preset or edit mode. Four are offered:
| Label | Notes |
|---|---|
| Fett263 · edit mode, gestures | The default for a saber planned in the Armory. Needs a voice pack on the card, see Fonts & SD. |
| SA22C | |
| BC | |
| ProffieOS default |
If a saber is plugged in and the board is not known, you can press Check the board. The saber restarts into bootloader mode for a few seconds, its flash size is read, and it comes straight back. Nothing is written. If the board was read from the saber at its last install, that choice is fixed and the other one is greyed out.
#Blades
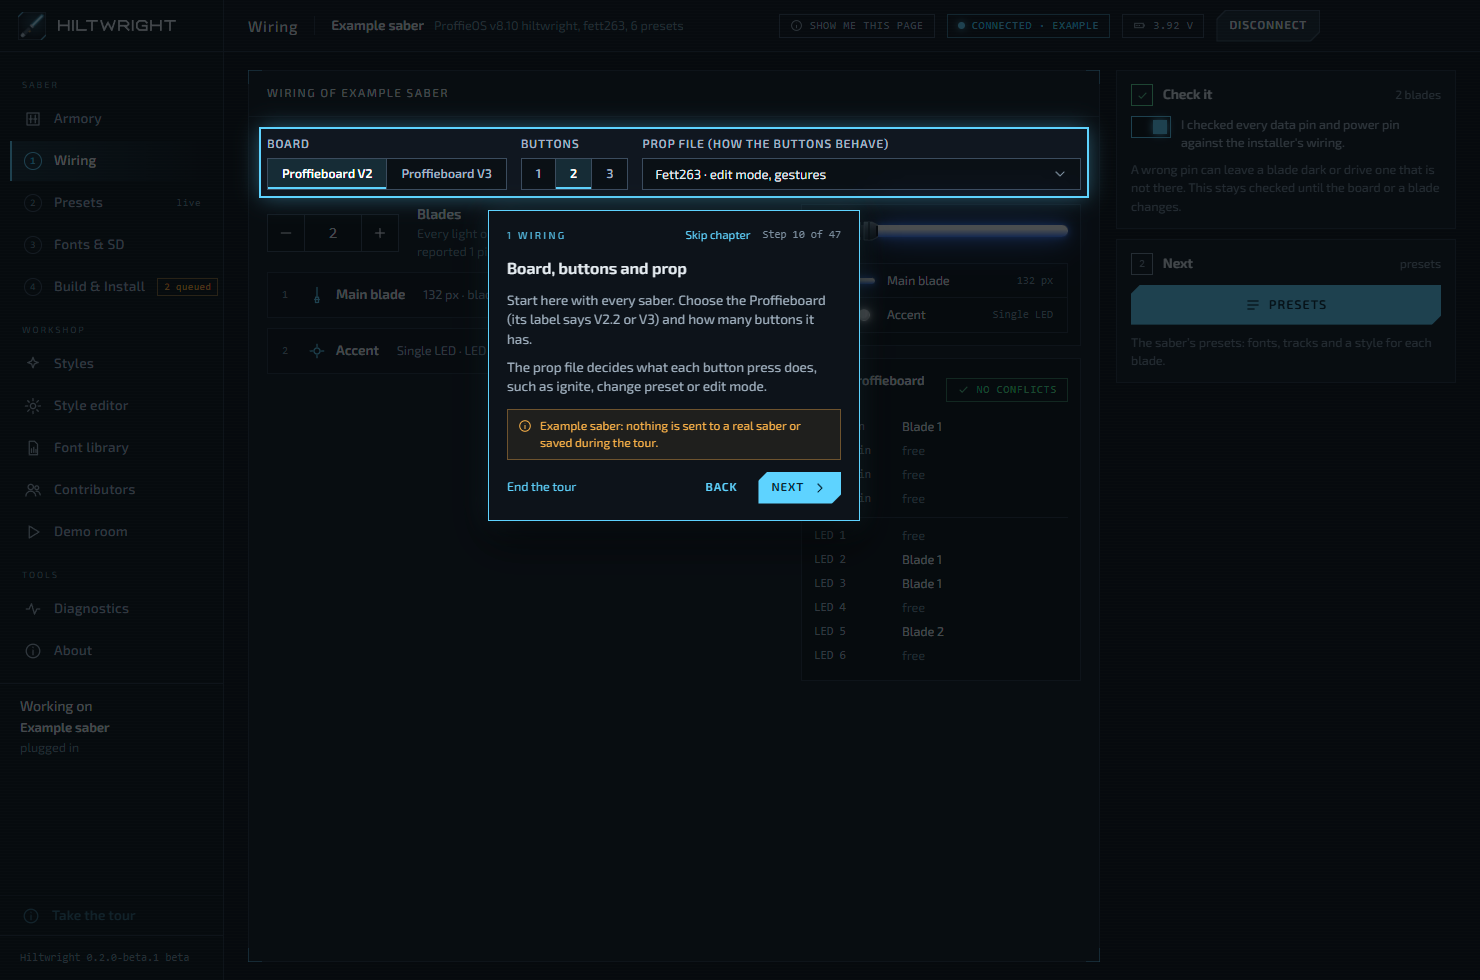
A blade is anything the saber lights or runs on its own: the main blade, a crystal chamber, an accent LED, a motor. Set how many there are with the minus and plus buttons (1 to 8). Adding a blade gives it the next role (main, then crystal, then accent) on the first free pins. Fewer blades removes them from the end.
Each blade shows as a row with a tick, or a warning if it has a problem. Open one to edit it.
What is it. Five roles are offered:
| Role | Hint shown |
|---|---|
| Main blade | The blade in the emitter |
| Crystal chamber | Pixels or an LED around the crystal |
| Accent | A lit switch, ring or window |
| Side blade | A quillon or second emitter |
| Motor | Spins a crystal chamber component |
Built from. For every role except Motor, choose "Pixel strip", "Single LED" or "Star LED". A star LED is a tri-colour LED on three power pins, red, green and blue in that order. A single LED uses one power pin.
For a pixel strip you also set:
- Pixels, the count.
- Colour order, one of GRB, RGB, GRBW, RGBW, BGR or BRG. Check your strip's datasheet if colours come out wrong.
- Strips on this wire. Strips soldered to the same data wire show the same thing and cannot be controlled separately, so they count as one blade.
Wiring. A pixel strip is either "Own data line" (its own wire and power pins) or "Continues another blade's wire" (the same strip, after another blade, sharing its power). A chained blade can also "Run the other way (reversed)". Single LEDs, star LEDs and motors only need power pins.
Note One blade must be the main blade. If none is, the pin table says "One blade must be the main blade."
#The pin table
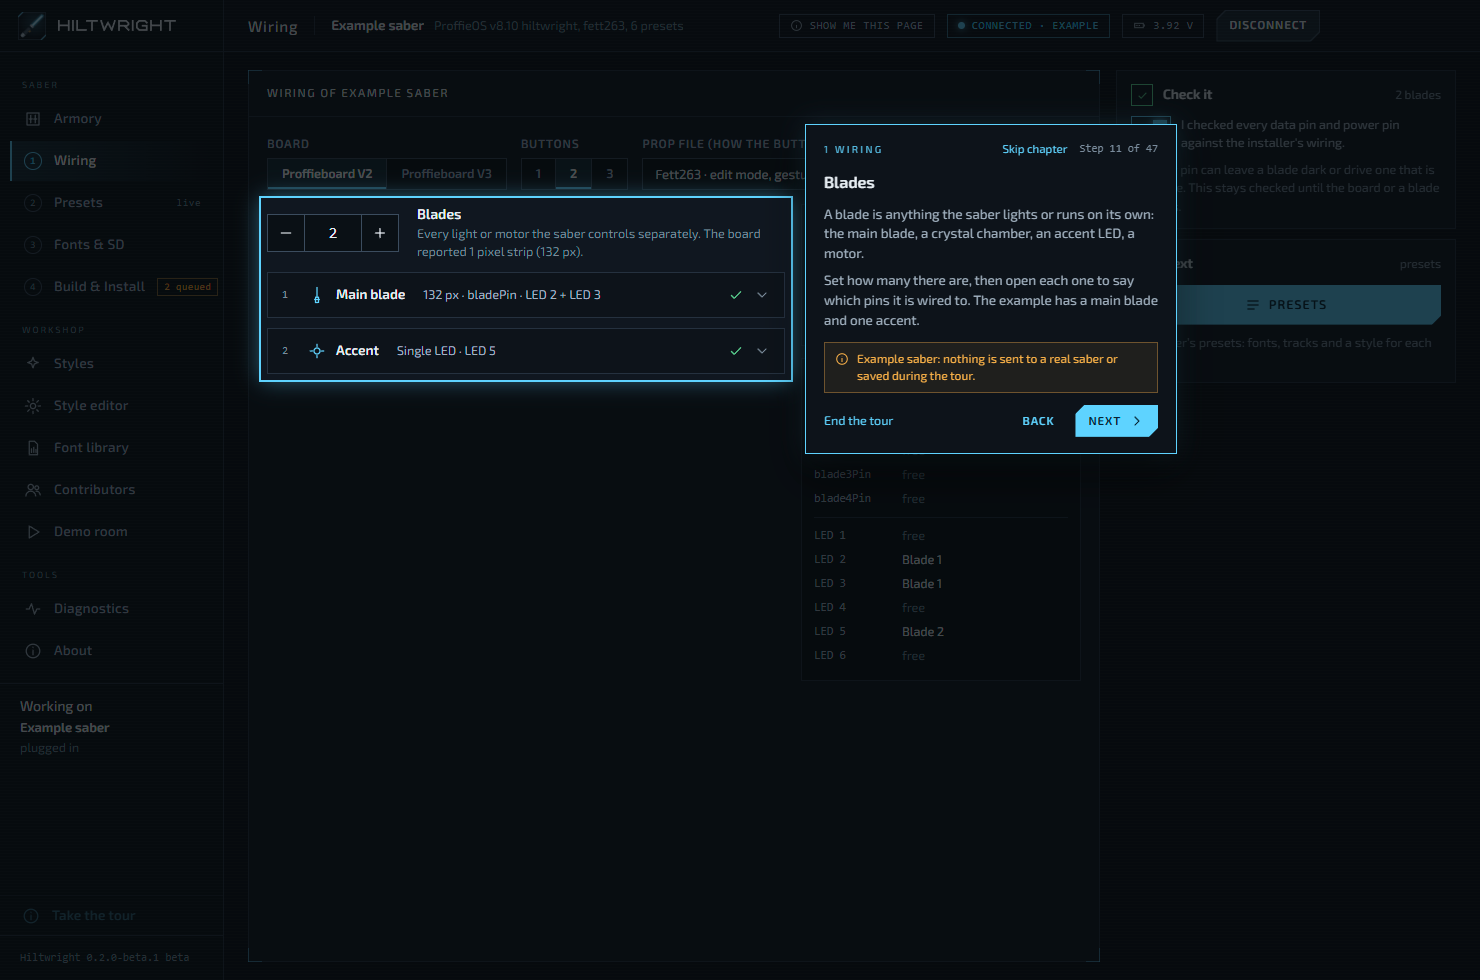
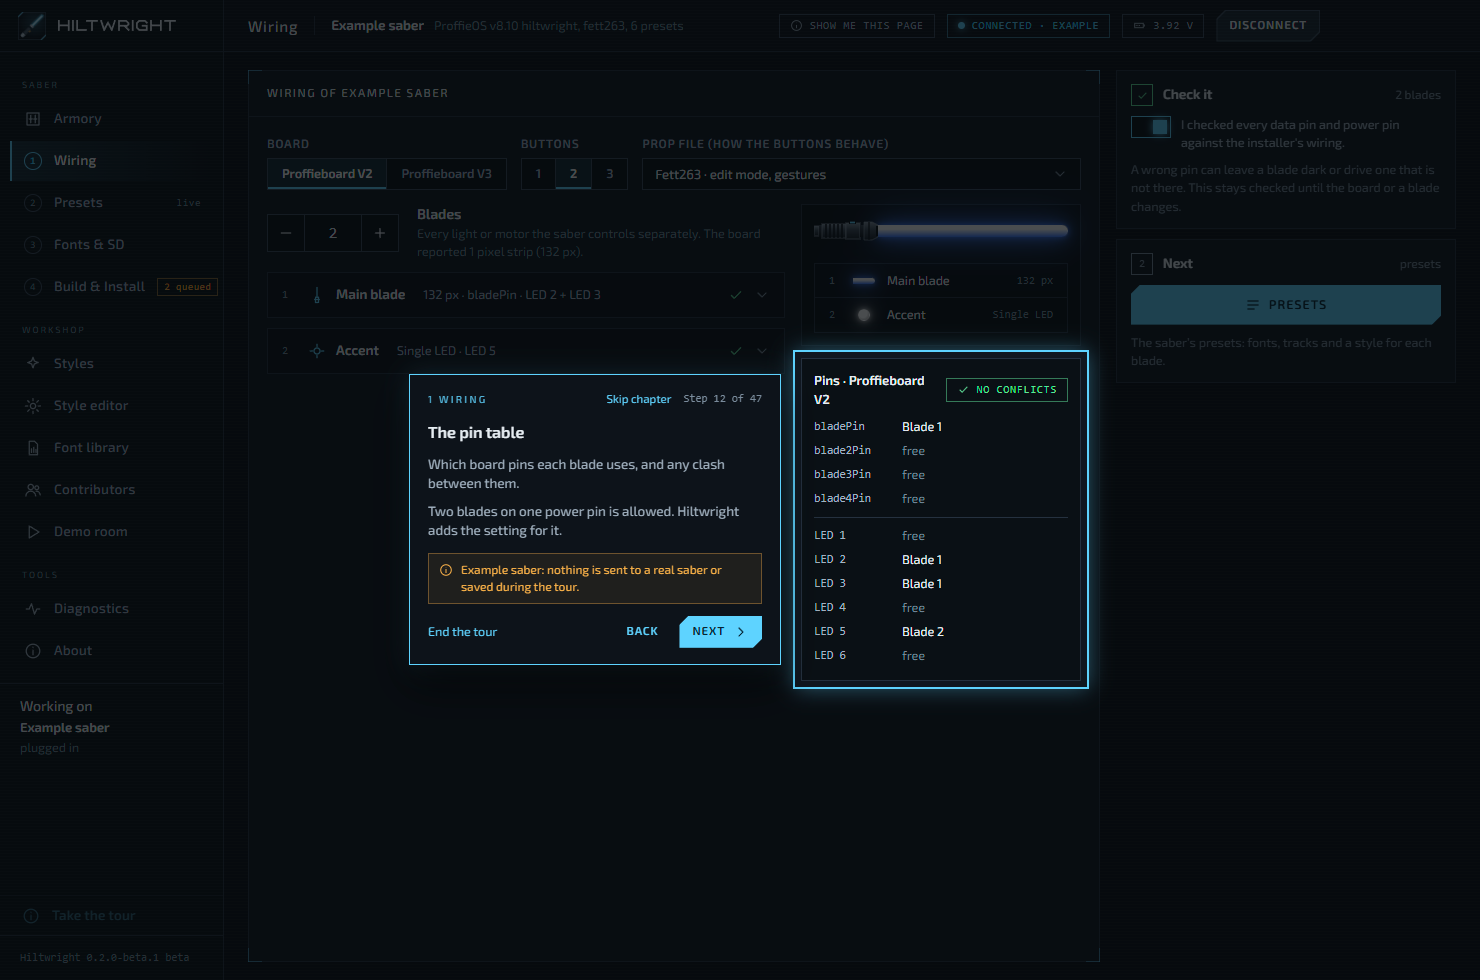
The panel on the right lists every data pin and power pin on your board, who uses it, and any clash.
- A green "No conflicts" chip means the wiring is valid.
- An amber "Shared power" chip means two blades use the same power pin. That is allowed. ProffieOS has a setting for it, and Hiltwright adds it for you at build time.
- A red chip such as "1 problem" lists what is wrong, in words like "Blade 2 needs a pixel count." or "(pin) has 2 separate strips on it. Chain them, or use different data pins."
Hiltwright will not build while a problem is listed. The pins on a Proffieboard V3 include extra "Free" pins. A small indicator LED can use one as PWM instead of a power pin. These low-current pins cannot drive a pixel strip, a star LED or a motor.
#Check it, then confirm
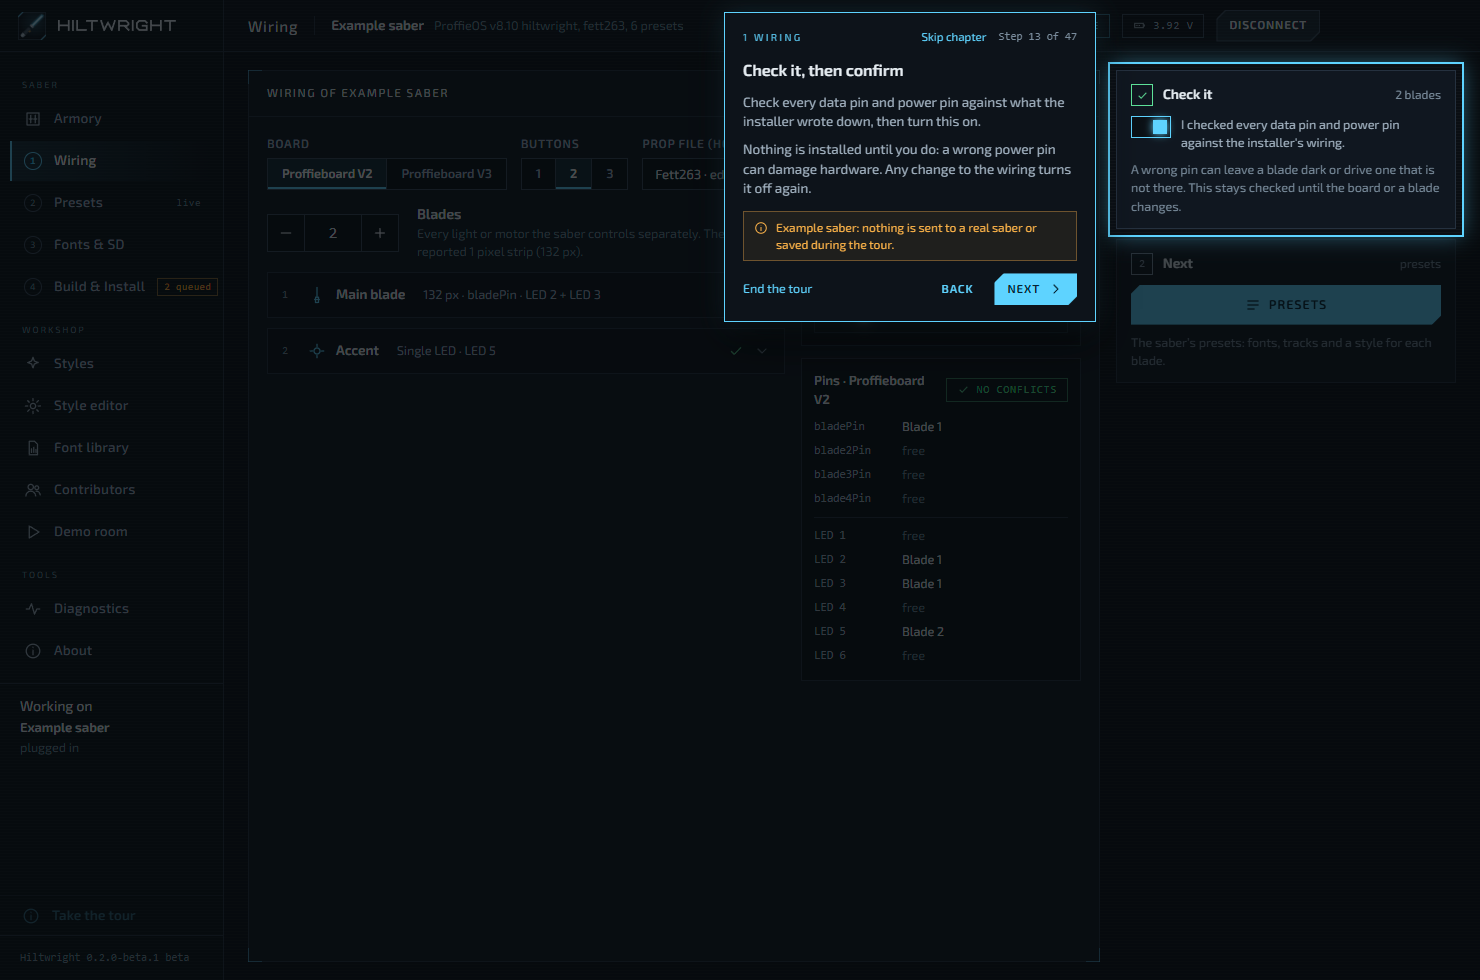
Check every data pin and power pin against what the installer wrote down. Then turn on I checked the wiring.
This switch exists because a wrong power pin can damage hardware. Nothing is installed until it is on. Until then the Presets button under "Next" is greyed out, and the Build & Install page shows "Confirm the wiring to unlock the install."
The confirmation belongs to the layout you checked. If you change the board or any blade, it turns off again. If you change it back, it comes back. A saber that was set up before this check existed asks you once: "Hiltwright now records which wiring you checked. Check it once more to go on."
If the saber reports pixel blades when you plug it in, Hiltwright says so as a starting point, not as the wiring. Check each blade yourself.
#What needs a rebuild
Wiring is compiled into the saber's firmware. After you change it, Build & Install says "The setup changed after this build. Build again to install it." Build again, then install. See Build & Install.
#If the wiring was changed elsewhere
If the wiring changes while this page is open (for example when you adopt a plan in the Armory), the page shows the new version. If you had an unsaved change, it says "This saber's wiring was changed elsewhere; your last change was not applied."
Next: Presets.
Written for Hiltwright 0.2.0-beta.3. Something wrong or missing? Tell us.